 Displaying Developer Data
As the next step let's create a small form for just displaying developer data. I'll keep this very, very simple first and then add a few enhancements to this base form to demonstrate some of the nice features that make it easy to provide rich content without any code easily and intuitively.
This page is accessed from the Developer List by clicking on the Company name hyperlink.
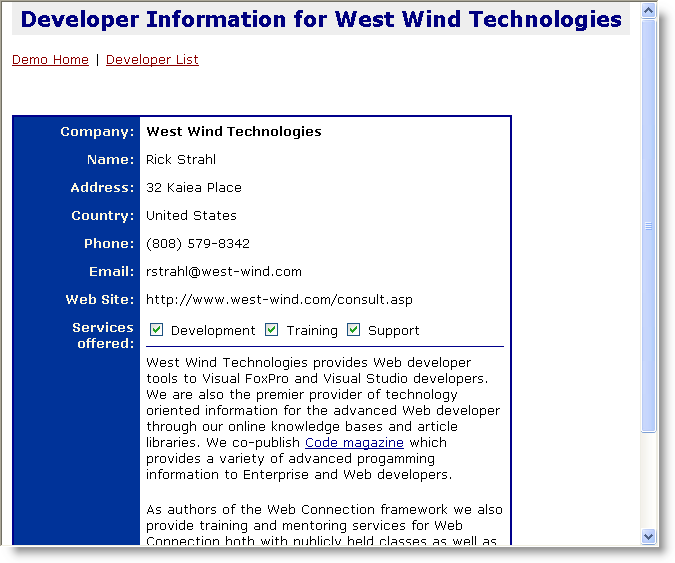
Here's what our first version of the form should look like in the browser:
To start let's create this form and call it ShowDeveloper.wcsx with a Codebehind class created as ShowDeveloper in ShowDeveloper_Page.prg. Here's what this page should look like:
<%@ Page Language="C#"
	ID="Showdeveloper_page"
	GeneratedSourceFile="DevDemo\ShowDeveloper_Page.prg"
 %>
<%@ Register Assembly="WebConnectionWebControls"
	Namespace="Westwind.WebConnection.WebControls"
	TagPrefix="ww"
%>
<html>
<head>
    <title>Developer Display for <%= this.Page.oDeveloper.oData.Company %></title>
    <link href="westwind.css" rel="stylesheet" type="text/css" />
</head>
<body>
    <form id="form1" runat="server">
    <div>
        <h1>Developer Information for
            <%= this.Page.oDeveloper.oData.Company %></h1>
    </div>
        <br />
        <a href="default.htm">Demo Home</a> | <a href="DeveloperList.wcsx">Developer List</a><br />
        <br />
        <br />
        <br />

    <table class="blackborder" width="500" cellpadding="6" >
    <tr>
    <td valign="top" align="right" class="blockheader" style="font-weight:bold" >
    Company:
    </td>
    <td valign="top">
        <ww:wwWebLabel ID="lblCompany" runat='server' ControlSource="this.Page.oDeveloper.oData.Company"  style="font-weight:bold"></ww:wwWebLabel> </td>
     </tr>
     <tr>
    <td  valign="top" align="right" class="blockheader" style="font-weight: bold">
    Name:
    </td>
    <td valign="top">
        <ww:wwWebLabel ID="lblName" runat='server' ControlSource="this.Page.oDeveloper.oData.Name"></ww:wwWebLabel> </td>
    </tr>
     <tr>
    <td  valign="top" align="right" class="blockheader" style="font-weight: bold; height: 28px;">
    Address:
    </td>
    <td valign="top" style="height: 28px">
        <ww:wwWebLabel ID="lblAddress" runat='server' ControlSource="DisplayMemo(this.Page.oDeveloper.oData.address)"></ww:wwWebLabel> </td>
    </tr>
         <tr>
    <td  valign="top" align="right" class="blockheader" style="font-weight: bold">
    Country:
    </td>
    <td valign="top">
        <ww:wwWebLabel ID="lblCountry" runat='server' ControlSource="this.Page.oDeveloper.oData.Country"></ww:wwWebLabel> </td>
    </tr>
     <tr>
    <td  valign="top" align="right" class="blockheader" style="font-weight: bold">
    Phone:
    </td>
    <td valign="top">
        <ww:wwWebLabel ID="lblPhoneNumber" runat='server'
         ControlSource="this.Page.oDeveloper.oData.Phone"></ww:wwWebLabel> </td>
    </tr>
     <tr>
    <td  valign="top" align="right" class="blockheader" style="font-weight: bold; height: 28px;">
    Email:
    </td>
    <td valign="top" style="height: 28px">
        <ww:wwWebLabel ID="lblEmail" runat="server" ControlSource="this.Page.oDeveloper.oData.Email"  /> </td>
    </tr>
      <tr>
    <td  valign="top" align="right" class="blockheader" style="font-weight: bold">
    Web Site:
    </td>
    <td valign="top">
        <ww:wwWebLabel ID="lblWebSite"  runat="server" ControlSource="this.Page.oDeveloper.oData.WebSite" />
    </tr>
    <tr>
       <td width="131" valign="top" class="blockheader" align="right" style="font-weight: bold">
       Services  offered:</td>
       <td valign="top" width="453">
           <ww:wwWebCheckBox ID="chkDevelopment" runat='server' ControlSource="this.Page.oDeveloper.oData.Dev" Text="Development" />
           <ww:wwWebCheckBox ID="chkTraining" runat='server' ControlSource="this.Page.oDeveloper.oData.Training" Text="Training" />
           <ww:wwWebCheckBox ID="chkSupport" runat='server' ControlSource="this.Page.oDeveloper.oData.Support" Text="Support" />
       <hr>
       <%= DisplayMemo(this.Page.oDeveloper.oData.Services) %>
       </td>
     </tr>
  </table>

  </form>
</body>
</html>
Note that this page basically consists of a number of wwWebLabel controls that are databound via their ControlSource properties. There are also three Checkbox controls which are used to display the logical values for which support options a developer supports.
Notice that the ControlSource property points at this.Page.oDeveloper.oData, which is the wwDevRegistry wwbusiness object that we've used so far. ControlSource values work the same as standard VFP form ControlSource properties so you can bind to fields, variables or as in this case properties of a business object.
From a logic perspective all we have to do on this page is load up the business object and then DataBind the form controls and we're done. The custom code behind for this page is very simple: It merely loads the business object based on the queryString ID value that was passed into the form. There's very little code:
**************************************************************
DEFINE CLASS Showdeveloper_page as WWC_WEBPAGE
***************************************
*** Your Implementation Page Class - put your code here
*** This class acts as base class to the generated page below
**************************************************************

oDeveloper = null

FUNCTION OnLoad()

this.oDeveloper = NEWOBJECT("wwDevRegistry","wwDevRegistry.vcx")

lnId = VAL(Request.QueryString("Id"))
IF lnId = 0 OR !this.oDeveloper.Load(lnId)
   Process.ErrorMsg("Invalid Developer",;
                    "Please make sure you select a valid developer to display.",,;
                    5,"developerlist.wcsx")
   RETURN
ENDIF

THIS.DataBind()
ENDFUNC

ENDDEFINE
Note that here I decided to display an error page that's external rather than displaying an error message in the same page. That's because if an invalid developer id was chosen there's really nothing you want to display on this 'display' page, so there's no need to continue on this page. Instead I use the standard Web Connection Process.ErrorMsg() page to display an error that automatically redirects back to the Developer Listing page.
So as you can see we've written almost no code to make this page. Everything happens in the markup by assigning the ControlSource which automatically binds the controls.
What about Binding Errors
What happens if you have an error in a binding expression? This is likely a frequent scenario, but if you have an error in a binding expression you will see the Text property of the control changed to *! Binding Error. This usually happens if you have an invalid expression or mistype a property name.Accessing Controls with Code
Remember that the controls are accessible to you via code so if you rather assign a value from the code behind you can do that as well. For example, the Web Site link is a Web site, so wouldn't it be nice to change the display to actually display a link to click on.FUNCTION OnLoad()
this.oDeveloper = NEWOBJECT("wwDevRegistry","wwDevRegistry.vcx")
lnId = VAL(Request.QueryString("Id"))
IF lnId = 0 OR !this.oDeveloper.Load(lnId)
...
RETURN
ENDIF
THIS.DataBind()
*** Manipulate lblWebSite control directly via Code
this.lblWebSite.Text = [<a href="] + this.oDeveloper.oData.WebSite + ;
[" target="__top">] + this.oDeveloper.oData.WebSite + [</a>]
ENDFUNCUsing Better Controls
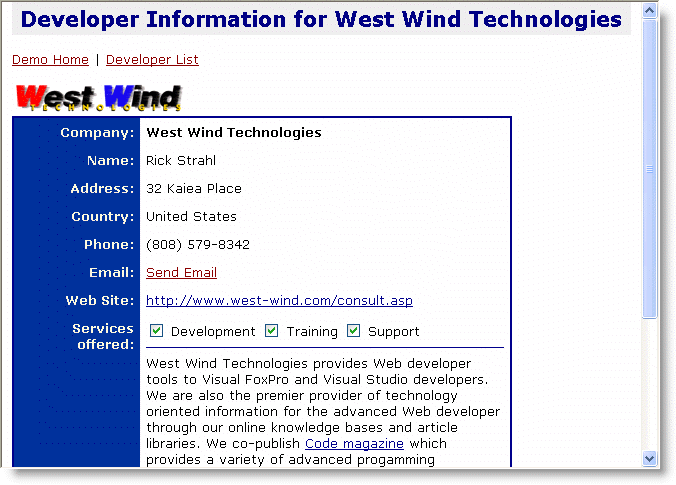
The above works just fine and is a great way to go if you have complex rules that need to fire for content in a control. But in the example above there's actually an easier way. Go ahead and remove the above line from the code. Let's flip back to WCSX page in the HTML editor and let's go and replace the wwWebLabel for lblWebSite with the following wwWebHyperLink control tag:<ww:wwWebHyperLink ID="hypWebSite" runat="server" ControlSource="this.Page.oDeveloper.oData.WebSite" />The HyperLink control automatically creates the hyper link and is smart enough to match Text and NavigateUrl properties based on the values provided. For databinding you can provide both LinkControlSource and a plain ControlSource for the text. If the NavigateUrl/LinkControlSource is missing it assumes the link is to be displayed for both.
Along the same lines let's use an wwWebEmailLink control for the email address. This control is nice as it encodes the email address so it can't easily be harvested. We'll take two shots at this. First let's replace the lblEmail control with the following:
<ww:wwWebMailLink ID="lblEmail" runat="server" EmailControlSource="this.Page.oDeveloper.oData.Email" />Go ahead and try this out. And voila you'll end up with an email link. The link will be minimally encoded with entities. Not much we can do if the email address has to display on the Web Page. But now change the code and add some static text like this:
<ww:wwWebMailLink ID="lblEmail" runat="server"
                  EmailControlSource="this.Page.oDeveloper.oData.Email" Text="Click here for email" />
and now the email address is not exposed in plain text anymore. You don't have to use static text either - you can bind the text using the ControlSource property. The following actually makes the most sense:
<ww:wwWebMailLink ID="lblEmail" runat="server"
                  EmailControlSource="this.Page.oDeveloper.oData.Email"
                  ControlSource="this.Page.oDeveloper.oData.Name" />
which displays the name and has a javascript link to the email link popup.
Ok, one more control. The wwDevRegistry also contains a Logo Url which if set points to a logo url for the company to display an image in the page. The easiest way to display this image is by using an wwWebImage control in the page at the top. Add the following control just above the <Table> tag:
<ww:wwWebImage runat="server" ID="imgLogo" ControlSource="this.Page.oDeveloper.oData.Logo" />The wwWebImage is really nice because you can databind it and it automatically detects empty image links and doesn't render if the image is empty, so you won't get broken links.
Here's what our form now looks like with all of these changes:
Cool. Now you can see how you can quickly display information using controls and databind the content in these controls. The next step is to actually be able to edit this information.
Next: Editing Developer Data

Comment or report problem with topic