 Step 3 - Finish and test the Server
The final step of the Wizard asks you to click Finish to run the configuration process. Let 'er rip!
Once it's done you need to do the following:
- Start the FoxPro Server (
Launch.prgorwcDemoMain.prg) - Start up the Web Server (if running IIS Express)
- Open up a Web Browser
Starting up the FoxPro Web Connection Server
After the setup program is done it'll automatically start the server for you and run as a standalone application out of the FoxPro IDE.
If you later need to start the server explicitly from a cold start follow these steps:
Use the WC Desktop Shortcut
Web Connection creates a shortcut on your desktop to start Web Connection. I highly suggest you use the shortcut or if one wasn't created that you create one manually as it sets the appropriate paths to find the support libraries. The short cut starts Web Connection the proper folder and sets path dependencies via the referencedconfig.fpwon the startup link.Manual Startup
If the shortcut didn't make it or you're the kind of person that likes to type paths you can also do the manual steps:Start Visual FoxPro
CD c:\wconnect(or wherever you installed Web Connection)DO LaunchorDO wcDemoMain
Starting up the Demo
Once FoxPro is up and paths are set use:
DO Launch.prg
Launch.prg opens the Web Browser and if running a server that needs to be started like IIS Expression ensures that it is running.
Launch.prg has a number of Launch Options
The launcher is meant to make it easy to launch a Web Server if it needs to be manually started - as is the case for IIS Express or BrowserSync - launch your Web Connection server and open your browser to the right URL. The launch can launch in a number of modes including IIS, IISEXPRESS, BROWSERSYNC, BROWSERSYNCIISEXPRESS or NONE which only lauches your app.
Example:
DO Launcher with "IISEXPRESS"
Alternately you can also launch only the FoxPro Server directly with:
*** Old School direct execution
DO wcDemoMain.prg

*** OR: Use the Launcher
DO Launcher with "NONE"   && or "SERVER"
This runs the sample application server. This server houses the simple demos, the Message Board, WebLog and MusicStore samples all from a single server.
Once you do this the server form pops up:
As requests come in they show up in the server window's output pane to give you an idea of what's happening. You see the time, the script name and the elapsed time in seconds for the request.
The Status Form
Click on the Status button to see the status information of the server that should display some of the information that you specified during the Wizard operation:
You can make additional configuration changes on this status form later on as well as retrieve information about individual requests.
Starting the Web Server
Make sure your Web Server is either already running or you start it explicitly. There are a number of different ways to run your Web Application.
Full IIS
If you're using full IIS the Web Server should already be running as it runs as a service. You can use the following from the commandline to check and restart IIS if it's not running already:
REM Recylce if already running, otherwise start IIS
IISRESET

REM Explicitly stop and start IIS
IISRESET /STOP
IISRESET /START
Next navigate to:
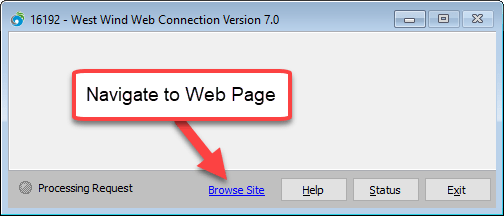
Again on first launch this will be automatic. You can also click on the Web Connection Server's status window Browse Site button:
The value for this is configurable in wcdemo.ini and the HomeUrl= key.
IIS Express
Unlike full IIS, IIS Express has to be started manually. You can easily do this using the Web Connection console.
From the Web Connection install folder inside of the FoxPro IDE:
*** Use the Launcher
DO LAUNCH WITH "IISEXPRESS"

*** Launch via the Console
DO CONSOLE WITH "IISEXPRESS"
This brings up an IIS Express launch dialog with a folder and port. In most cases you can just press Enter to accept the defaults which brings up the Web Browser at:
with the sample application loaded.
If you plan on using IIS Express you might want to change the home url from http://localhost/wconnect/ to http://localhost:7000 or whatever port you chose in wcdemo.ini
[Main]
REM IIS
REM HomeUrl=http://localhost/wconnect

REM IIS Express
HomeUrl=http://localhost:7000
Accessing the Web Connection Demos
The next step is to fire up your Web Browser and access the demo page. If you chose the default install options you should now be able to go to:
IIS:
http://localhost/wconnect/default.htm
IIS Express:
http://localhost:7000/default.htm
and access the Web Connection demo page. If this doesn't work please check the Troubleshooting section.
Scroll down to the first request Hello World with Web Connection and run that - it's a very simple page that spits back some basic status information and just tells you the app is working.
If everything is working OK you should get a response page almost immediately that says Hello World from Visual FoxPro! followed by additional information about some of the server variables exposed by the server.
If this didn't work please see the setup troubleshooting topic.
You're ready to go
Otherwise you're in business! Go ahead and browse around the demo page and check out some of the links. Note that most requests have a Show Code link on the bottom of the page that lets you quickly review the Visual FoxPro code that drives the request.
Back at the Web Connection Server
If you flip back to the Visual FoxPro instance that we started up at the beginning of this topic you'll find that there is now some request information in it like this:
00:07:33   wwDemo~ShowImage  - 0.022
00:18:26   testpage.wwd  - 0.040
Each request that hits the server shows in the main window along with the time that it took to run. At the same time the request gets logged into a log file where you can review and summarize the incoming requests. You can access this log file from the admin page at http://localhost/wconnect/admin.asp and the Show Web Connection Request Log request.
The admin page allows a number of administrative tasks from server monitoring to setting configuration options remotely over the Web to changing operational modes of the server. It's a good idea to shortcut this page in your Favorites list.

Comment or report problem with topic