 Administration UI Configuration
Depending on which version of Westwind.Globalization you run for .NET Core or .NET 4.x the Administration UI set up is slightly different.
.NET Core: Download Administration UI Zip File
.NET Core no longer allows content as part of NuGet packages, and these zip files provide the additional content files you can add to your project.
This folder contains two sets of support files in zipped format:
Localization Administration UI for ASP.NET Core
This Zip file contains the HTML, CSS, Scripts and Images to run the Localization Administration UI for ASP.NET Core. DownloadSample Page and Resources for ASP.NET Core
This zip file contains a sample page and resources you can play with when first setting up Westwind.Globalization in a ASP.NET Core site. Download
The Admin UI requires ASP.NET Core MVC
Both of these HTML support addons rely on features of ASP.NET MVC in order to run. Make sure your ASP.NET Core app has
app.UseMvc()andapp.UseStaticFiles()as part of its startup code in order for the Admin UI to work.
Download and Unpack the Administration UI
.NET Core only
Here are the detailed steps:
- Download LocalizationAdministration_AspNetCore.zip
- Unzip the package into the root folder of your ASP.NET Core MVC application
From here on in getting the application to run is the same process as described in the Installation topic:
Running and Configuring the Localization Administration
All platforms
Before anything else make sure the application compiles and runs. You should be able to bring up the Administration UI now by going to (using port :5004 here):
When you run the application you get to the Admin UI and an error message on the bottom. You should also have a Create Database Button the upper right.
![]()
Make sure you've created a valid connection string in your configuration and that the database exists. Then click the Create Database button to create the database.
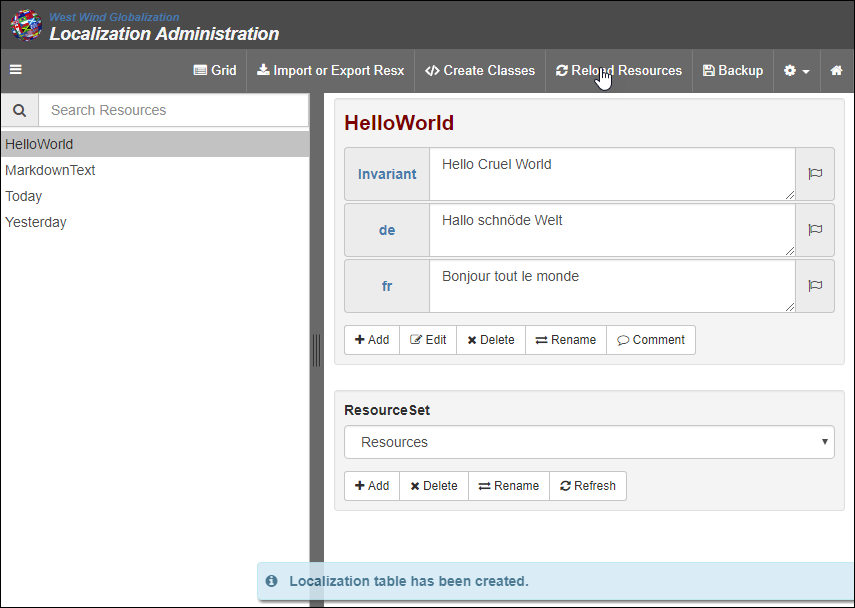
If all goes well you should now be seeing a few resources loaded inside of the resource editor.
Importing LocalizationAdmin Resources
If you want to use localized resources for the Administration UI (English and German are supported), you can also import resources from the shipped Resx resources. Importing allows you to view and edit the existing resources or potentially localize for other languages.
To import resources:
- Click Import or Export Resx
- Select Import Resources from ~/Properties/
- Click Import
- In the ResourceSet drop down find the LocalizationForm entry
- Click on Reload Resources to force resources to Refresh
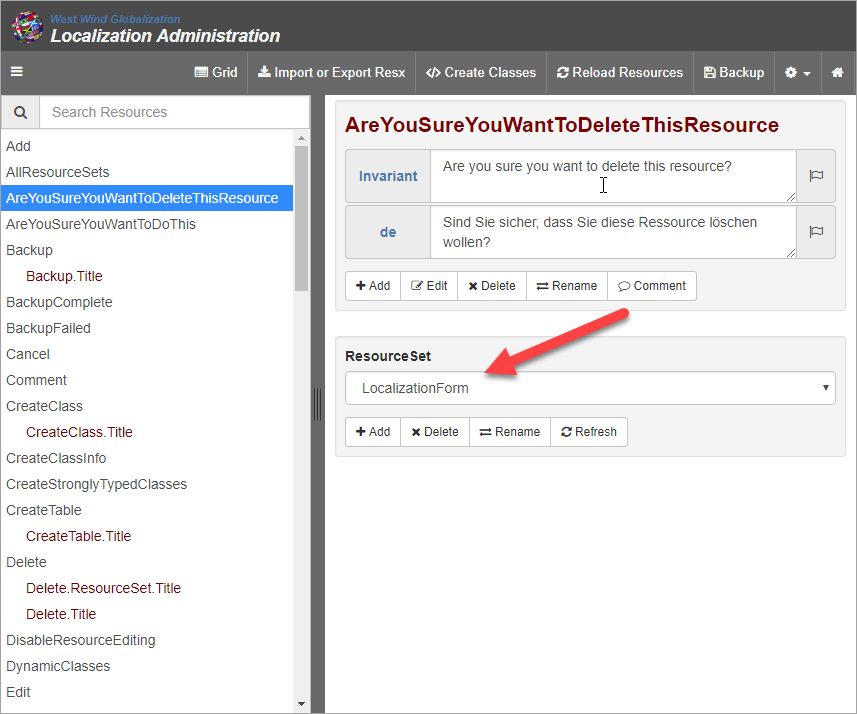
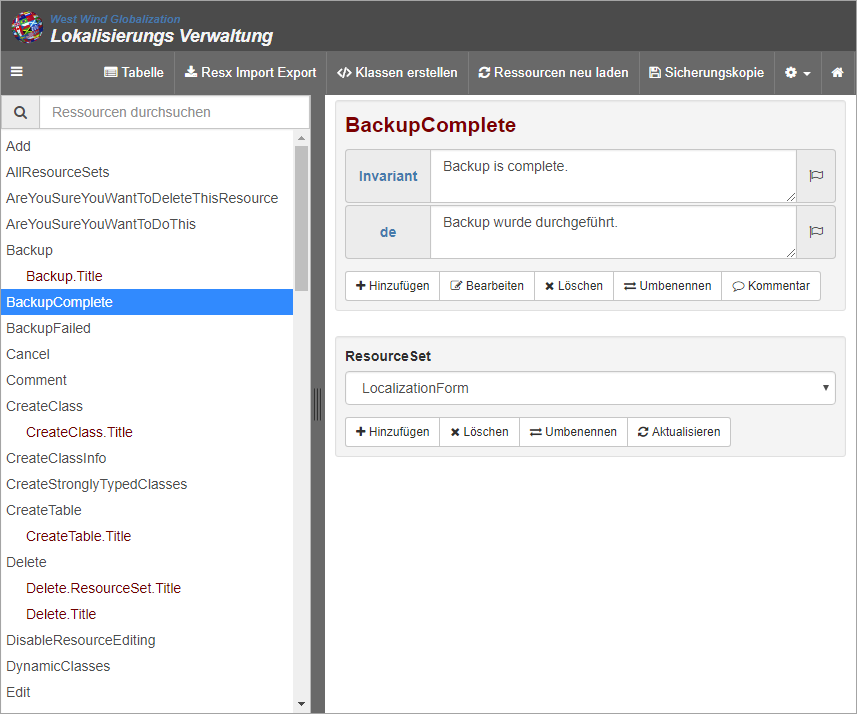
You should now also be able to switch your language to German and see the UI running with German labels.
Setting up ResourceTest Sample Page
The ResourceTest Sample page allows you to check out Westwind Globalization in your application and to easily check and see if the localization configuration features are set up properly.
To install:
- Download the zip file
- Unzip in the root folder of your ASP.NET Core MVC application
- Recompile your project
What it Does
The zip file copies a sample page and resources:
Pages/ResourceTest.cshtml- Copies several Resource files into
Propertiesfolder
In order to use these:
- Unzip the files into the project root
- Recompile your project
- Start the Localization UI
- Import Export Resx
- Import Resources
- Navigate to /ResourceTest

Comment or report problem with topic